
Canva is a free, online design software. It uses a drag-and-drop format and provides access to over a million photographs, graphics, and fonts. It is used by non-designers as well as professionals. The tools can be used for both web and print media design and graphics.
With a few simple clicks, you can design and create gorgeous, professional labels from Canva's pre-designed fonts, images, icons and layouts.
On this page, we will walk you through the steps for creating Dashleigh labels in Canva.
Instructions

1. Find your Template using our Template Directory. You can find the 4-digit template no.
On the info label of your template packaging
On the Amazon listing in the bullet points
On the Dashleigh store product page.
Go to Find My Template or search to navigate to your template download page
On the download page, select the Canva Template button.
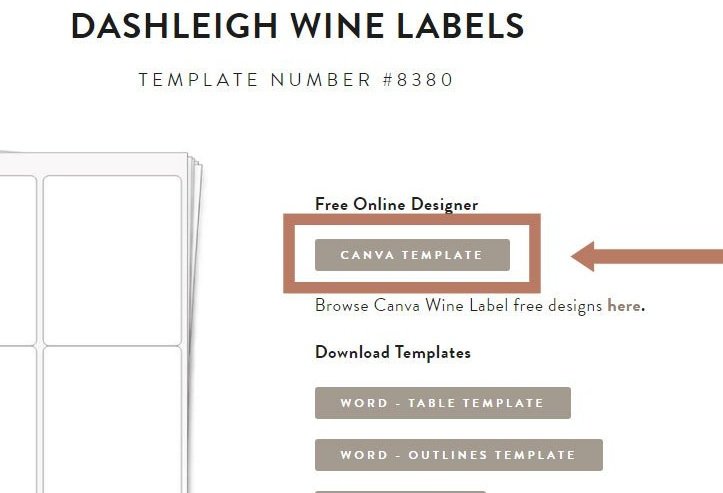

2. On the Template Download Page- look for the “Canva Template” button to go to the Canva permission page.
This will take you to the your Canva account. Canva is free to use with a sign up. You can use:
Your Google account
Your Facebook account
Your Apple account, or
An email.
3. On the Canva site, use the Elements, Graphics, Text and more to design your labels and hangtags by dragging and dropping the element on to the template.
4. At any point in the design process, you can select the background outline image and move the transparency bar in the top right hand corner to hide and show the lines. This will allow you to make sure that your designs will print in the labels themselves.
5. To print: Select the Share button, to open the dropdown. From there select:

Print PDF
CMYK
Download
6. Open the PDF and select the following print settings:
Portrait
High quality Color, or similar
100% or Actual size (Fit to page will cause the design to shift from the labels)
Creating Your Labels and Hangtags in Canva
Go to the Upload tab.
Upload your own images by selecting the JPG you downloaded from Dashleigh template center.
The image will now appear as a usable element in your uploads section
Optional: You can also upload any images that you want to add to your label or hangtag, and they will stay here to use.

6. Stretch the JPG background to fill the space of the document. (Don't forget to delete the background before printing!)
7. Design away! Use Canva's extensive photos, fonts, icons and elements to design your own labels. Just drag, drop and customize. (For purchased Canva labels, see below)
8. Once finished, delete the background JPG, so the outlines do not print on your labels.
9. As always, print a test page- before printing directly on your labels.
Need to Add Purchased Labels to your template?
Currently, Canva is offering various label templates that you can purchase on their website. The instructions below are going to walk you through steps to add your purchased label on Canva to your Dashleigh template.
Summary: These steps will show you how to copy the label you purchased and paste it into the document you created above.
On your existing purchased label document within Canva, “group” all of the items in your purchased labels.
To group your items in Canva:
Select the elements you want to be grouped either by dragging your cursor or holding down the “shift” key and clicking each element.
Then, move your mouse to the top right of the screen and click “Group.” You can also hold “command/ctrl” and then click the letter “G.”
Copy the grouped set of items.
Navigate to your Dashleigh 8.5 x 11 inch document in Canva.
Paste the items, drag, and drop them into place. (You may need to ungroup these items if the sizes between your labels and the template are different.)
Complete each label on the template.
After all of your labels are in place, delete the background pdf or jpg image before saving as a pdf or printing.